Creative Reese's Peanut Butter Pie
Highlighted under: Homemade Dessert Recipes
I absolutely love making desserts that not only satisfy my sweet tooth but also bring joy to those I share them with. This Creative Reese's Peanut Butter Pie is a delightful twist on a classic favorite, combining a rich peanut butter filling with a chocolate crust that is simply irresistible. Every bite is a heavenly experience filled with creamy, nutty flavors and a hint of crunch. Plus, it’s surprisingly easy to make, which makes it perfect for any occasion – whether it's a family gathering or a casual get-together with friends!
When I was experimenting in the kitchen, I envisioned a dessert that was both indulgent and foolproof, and this Creative Reese's Peanut Butter Pie came to life. I wanted to create something that would wow my guests but not require hours of preparation. Using store-bought ingredients not only saved me time but also ensured a consistent flavor that I could rely on, making this pie one of my go-to recipes!
One specific tip I learned is to let the pie chill in the refrigerator for at least an hour before serving. This allows the flavors to meld beautifully and the filling to set just right, resulting in a smooth and creamy texture. Trust me, that's the sweet spot for a perfectly satisfying dessert!
Why You'll Love this Recipe
- Decadent peanut butter taste perfectly complemented by chocolate crust
- Quick and simple preparation that anyone can master
- Impressive dessert that’s perfect for gatherings or celebrations
Understanding the Ingredients
The key to a rich and creamy filling lies in the quality of your peanut butter. Opt for a creamy, not chunky, version for a smooth texture that blends beautifully with the whipped cream. Natural peanut butters can be a bit too oily; if you go that route, give it a good stir before measuring to ensure consistency. The powdered sugar adds sweetness and also helps stabilize the filling, creating the perfect balance with the salty notes of peanut butter.
When selecting chocolate cookie crumbs for the crust, consider using Oreos for their classic chocolate flavor or any brand you prefer. For a gluten-free option, gluten-free chocolate cookies work wonderfully. The melted butter binds the crumbs together, making the crust both flavorful and structurally sound. Baking the crust helps set the edges, so they hold up better when sliced—look for it to become fragrant and slightly firm to the touch.
Perfecting Your Technique
When pressing the crust into the pie dish, use a flat-bottomed measuring cup or a tamper to create an even surface. This ensures that the crust is compact and avoids crumbling when you cut into the pie later. If you notice any cracks while pressing, just patch them up with additional crumb mixture. Remember to keep an eye on the oven while it bakes; the ideal crust should be set to a golden hue without being burnt.
While assembling the pie, make sure the crust is completely cooled to prevent the filling from melting into it. Spreading the peanut butter filling can be a bit tricky; use the back of a spoon or an offset spatula to glide over the surface for a smooth finish. Refrigerating the pie for at least an hour not only allows it to set properly but also melds the flavors together, resulting in a more harmonious taste.
Ingredients
For the Filling:
- 1 cup creamy peanut butter
- 1 cup powdered sugar
- 1 cup whipped cream
- 1 teaspoon vanilla extract
For the Crust:
- 1 ½ cups chocolate cookie crumbs
- ½ cup unsalted butter, melted
- 2 tablespoons granulated sugar
For Topping:
- Additional whipped cream
- Reese's peanut butter cups, chopped
Instructions
Prepare the Crust
In a medium bowl, combine the chocolate cookie crumbs, melted butter, and sugar. Mix until well combined. Press the mixture firmly into the bottom and up the sides of a pie dish to form the crust. Bake in a preheated oven at 350°F (175°C) for about 10 minutes. Allow to cool completely.
Make the Filling
In a large mixing bowl, beat together the peanut butter, powdered sugar, whipped cream, and vanilla extract until smooth and creamy. Make sure there are no lumps for the best texture.
Assemble the Pie
Spread the peanut butter filling evenly over the cooled crust. Smooth the top with a spatula. Refrigerate for at least 1 hour or until set.
Serve
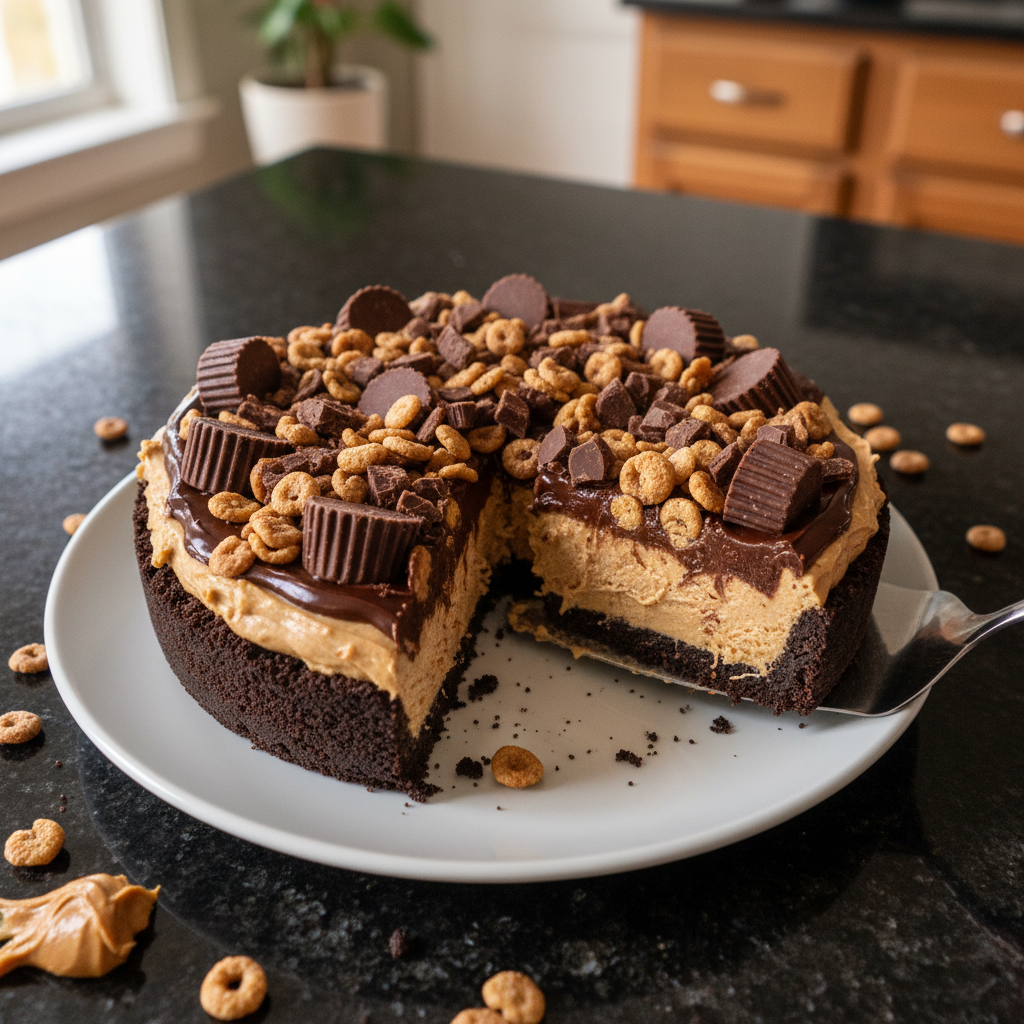
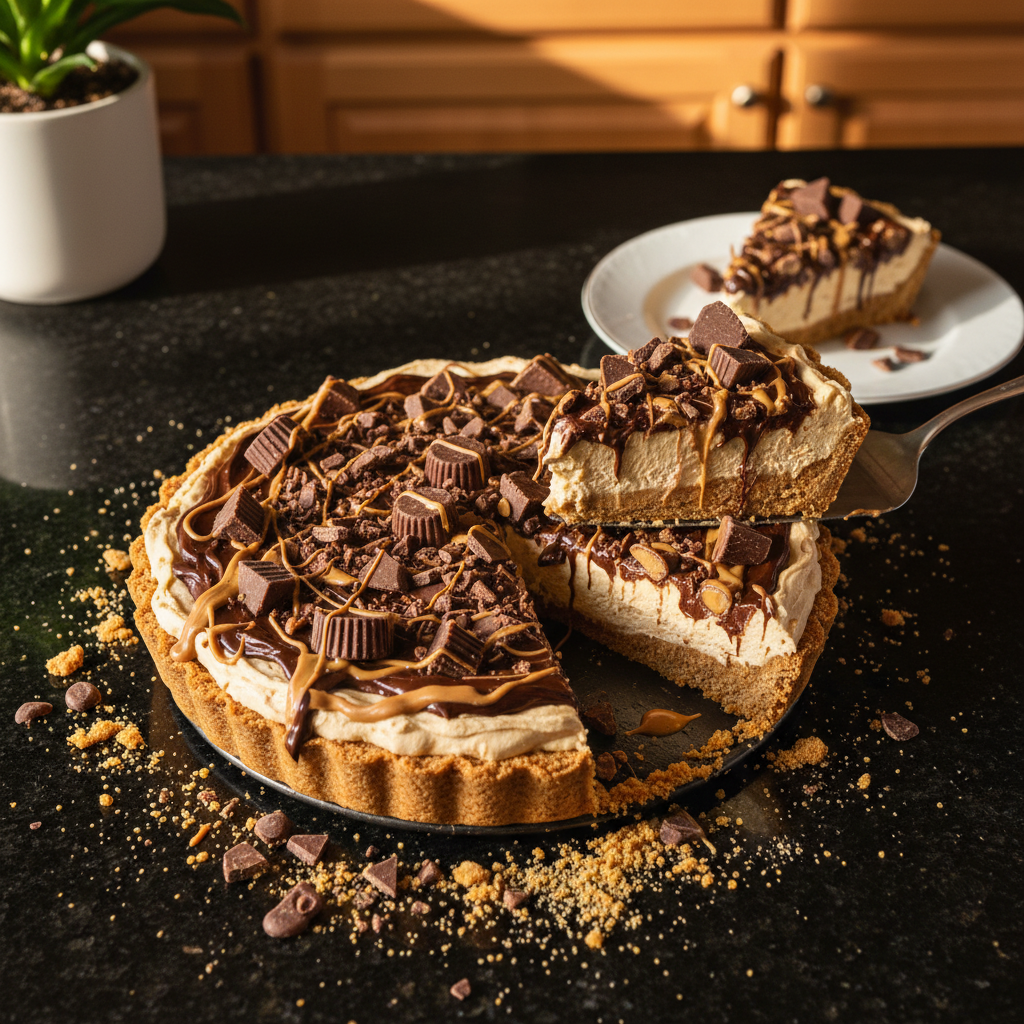
Once set, garnish with additional whipped cream and chopped Reese's peanut butter cups before slicing and serving. Enjoy the creamy and crunchy layers in this delightful pie!
Pro Tips
- For an extra crunchy texture, consider adding chopped peanuts or a layer of crushed cookies on top of the filling before chilling. This adds an enjoyable contrast to the creamy filling.
Serving and Presentation Ideas
To make your Creative Reese's Peanut Butter Pie even more appealing, consider drizzling melted chocolate over the top before adding the whipped cream and crushed peanut butter cups. This adds an extra layer of decadence and a visual pop that can impress your guests. You can also chill the pie before slicing; the cold filling makes for cleaner cuts and enhances the overall experience.
Pair your pie with fresh fruit like sliced bananas or strawberries to cut through the richness and add a refreshing element. This creates a delightful contrast in flavors and textures, making each bite unique. Serve each slice on a colorful plate garnished with a dollop of whipped cream and a sprinkle of chocolate shavings for that extra touch.
Storage and Make-Ahead Tips
If you're planning to make the pie ahead of time, it can be stored in the refrigerator for up to three days. Just ensure it's covered tightly with plastic wrap to avoid any absorption of flavors from other foods in the fridge. Alternatively, you can freeze the pie for up to a month. It's best to do this before adding the toppings. To serve, simply thaw in the fridge overnight and top it with whipped cream and Reese's cups right before indulging.
In terms of portion sizes, if you want to scale this recipe up for a larger gathering, simply double your ingredient amounts. Use a 9x13-inch baking dish instead of a pie dish for easier slicing and serving. Adjusting bake times may be necessary for the crust; keep a close eye on it and use the same indicators of doneness—fragrant and firm to the touch.
Questions About Recipes
→ Can I use crunchy peanut butter instead of creamy?
Absolutely! Crunchy peanut butter will add more texture and flavor to the pie.
→ How long can I store the pie in the refrigerator?
The pie can be kept covered in the refrigerator for up to 3 days.
→ Can I freeze the pie?
Yes, you can freeze the pie! Just wrap it tightly in plastic wrap and aluminum foil and consume it within a month for the best quality.
→ What can I use instead of whipped cream?
You can substitute whipped cream with whipped coconut cream or any non-dairy whipped topping for a different flavor.
Creative Reese's Peanut Butter Pie
Created by: The Chefwoven Team
Recipe Type: Homemade Dessert Recipes
Skill Level: Easy
Final Quantity: 8 slices
What You'll Need
For the Filling:
- 1 cup creamy peanut butter
- 1 cup powdered sugar
- 1 cup whipped cream
- 1 teaspoon vanilla extract
For the Crust:
- 1 ½ cups chocolate cookie crumbs
- ½ cup unsalted butter, melted
- 2 tablespoons granulated sugar
For Topping:
- Additional whipped cream
- Reese's peanut butter cups, chopped
How-To Steps
In a medium bowl, combine the chocolate cookie crumbs, melted butter, and sugar. Mix until well combined. Press the mixture firmly into the bottom and up the sides of a pie dish to form the crust. Bake in a preheated oven at 350°F (175°C) for about 10 minutes. Allow to cool completely.
In a large mixing bowl, beat together the peanut butter, powdered sugar, whipped cream, and vanilla extract until smooth and creamy. Make sure there are no lumps for the best texture.
Spread the peanut butter filling evenly over the cooled crust. Smooth the top with a spatula. Refrigerate for at least 1 hour or until set.
Once set, garnish with additional whipped cream and chopped Reese's peanut butter cups before slicing and serving. Enjoy the creamy and crunchy layers in this delightful pie!
Extra Tips
- For an extra crunchy texture, consider adding chopped peanuts or a layer of crushed cookies on top of the filling before chilling. This adds an enjoyable contrast to the creamy filling.
Nutritional Breakdown (Per Serving)
- Calories: 380 kcal
- Total Fat: 26g
- Saturated Fat: 15g
- Cholesterol: 195mg
- Sodium: 85mg
- Total Carbohydrates: 32g
- Dietary Fiber: 3g
- Sugars: 24g
- Protein: 6g