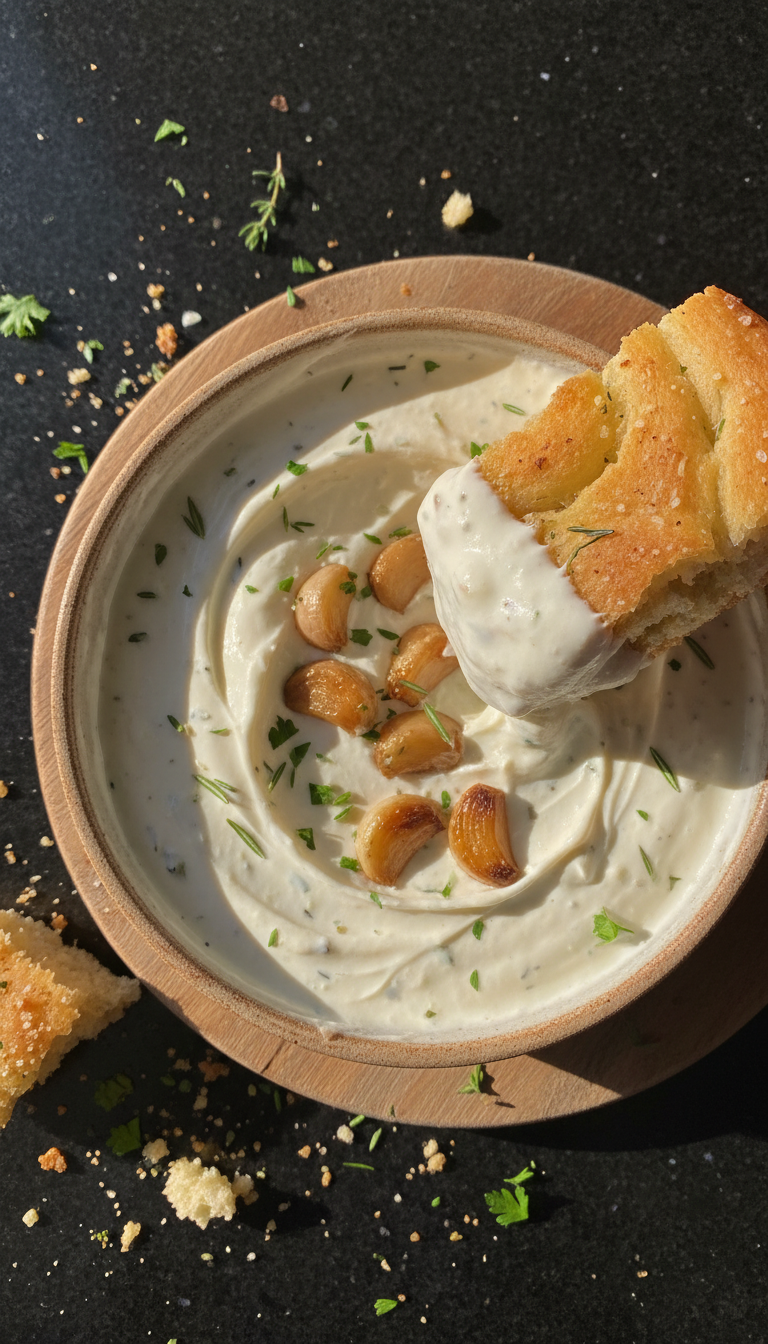
Roasted Garlic Aioli with Focaccia
Highlighted under: Comfort Dinner Recipes
I absolutely love making roasted garlic aioli! This creamy dip combines the unmistakable flavor of roasted garlic with a smooth texture that elevates any dish. I can’t resist pairing it with warm, homemade focaccia, which soaks in the rich flavors beautifully. The process of roasting the garlic mellows its sharpness, creating a wonderful depth that makes this aioli perfect for dipping, spreading, or drizzling. Whether I'm serving it at a gathering or enjoying it on a quiet evening, it truly brings a delightful touch to the table.
My journey with roasted garlic aioli began on a cozy evening when I wanted a dip that was both indulgent and simple. After experimenting with ratios of garlic and oil, I found the perfect balance that satisfied my cravings. Roasting the garlic until it caramelizes not only softens the harshness but also brings out a sweetness that is absolutely divine.
One tip I learned is to let the aioli chill for at least 30 minutes before serving. This allows the flavors to meld beautifully. When it’s paired with freshly baked focaccia, it becomes an unforgettable treat that leaves everyone asking for more!
Why You Will Love This Recipe
- Creamy aioli with a rich roasted garlic flavor
- Warm focaccia that's perfect for dipping
- Quick and easy recipe that impresses guests
The Role of Garlic in Aioli
Roasting garlic transforms its sharpness into a sweet, nutty flavor that makes aioli irresistible. When heated, the natural sugars in the garlic caramelize, giving this dip a rich, deep taste that enhances every bite. It's crucial to allow the garlic to roast until it's soft, which usually takes around 30 minutes at 400°F (200°C). If you notice the outer layers browning too much or burning, you can lower the oven temperature slightly, ensuring a perfect roast every time.
Once roasted, let the garlic cool before handling. This mellowing process not only enriches the flavor but also makes the cloves easier to squeeze out. I recommend using a fresh bulb for the best taste; pre-packaged garlic may lack the complex sweetness that fresh roasted garlic provides. The balance of flavors will be worth the extra care.
Making Perfect Focaccia
Focaccia can be a fantastic companion to your aioli due to its light and airy texture. When mixing the dough, ensure that your warm water is around 110°F (43°C) to activate the yeast effectively. If your water is too hot, it could kill the yeast, leading to a dense bread that doesn't rise well. Kneading the dough for about 5 minutes develops gluten, which gives the focaccia its structure. Keep an eye on the texture — the dough should be smooth and elastic, not sticky.
After the first rise, which takes about an hour, the dough should double in size. An important step is to make dimples in the dough right before baking; this not only creates a beautiful presentation but also allows for more surface area to absorb the olive oil, resulting in a crispy crust. Baking at 425°F (220°C) will usually yield a golden top, but keep an eye on it to avoid over-baking.
Ingredients
Gather these ingredients to make your roasted garlic aioli.
For the Aioli
- 1 whole garlic bulb
- 1 cup mayonnaise
- 2 tablespoons lemon juice
- 1/4 teaspoon salt
- 1/4 teaspoon black pepper
- 1/2 cup olive oil
For the Focaccia
- 2 cups all-purpose flour
- 1 teaspoon active dry yeast
- 1 teaspoon salt
- 1 cup warm water
- 2 tablespoons olive oil
- 1 teaspoon rosemary (fresh or dried)
Now you have everything you need to create this delicious appetizer.
Instructions
Follow these steps to prepare your roasted garlic aioli and focaccia.
Roast the Garlic
Preheat your oven to 400°F (200°C). Cut the top off the garlic bulb to expose the cloves. Drizzle with olive oil, wrap in foil, and roast for 30 minutes until soft.
Make the Focaccia
In a bowl, combine flour, yeast, and salt. Stir in warm water and olive oil until a dough forms. Knead for 5 minutes, cover, and let rise for 1 hour.
Blend the Aioli
Once the garlic is roasted and cool, squeeze the cloves into a bowl. Add mayonnaise, lemon juice, salt, and pepper. Mix until smooth and slowly drizzle in olive oil while whisking until creamy.
Bake the Focaccia
Preheat the oven to 425°F (220°C). Shape the dough into a rectangle on a baking sheet. Make dimples with your fingers, drizzle with olive oil, sprinkle with rosemary, and bake for 20 minutes until golden.
Serve
Once cooled, cut the focaccia into squares and serve with the roasted garlic aioli. Enjoy the combination!
Enjoy your delicious homemade aioli with fresh focaccia!
Pro Tips
- For an extra kick, add a pinch of cayenne pepper to the aioli. You can also experiment with adding herbs like basil or parsley for a different flavor profile.
Storage and Make-Ahead Tips
Both roasted garlic aioli and focaccia are best enjoyed fresh, but they can be stored for later use. The aioli can be refrigerated in an airtight container for up to a week, allowing the flavors to meld even further. To maintain its creamy texture, stir it well before serving if it thickens in the fridge.
For the focaccia, you can store it at room temperature for a day or two, but for longer freshness, keep it in an airtight container or freezer bag in the freezer. When you're ready to enjoy it again, reheat the focaccia in the oven at 350°F (175°C) for about 10-15 minutes to bring back its original texture.
Variations and Additions
Feel free to customize your aioli with different herbs or spices. Adding a tablespoon of fresh chopped parsley or a hint of smoked paprika can provide layers of flavor that differentiate it from the classic version. You might also consider incorporating some grated Parmesan cheese for a silky texture and an umami kick.
As for focaccia, it can be made even more indulgent by adding toppings. Try sprinkling sea salt or inserting slices of olives or sun-dried tomatoes before baking. You can also experiment with different herbs; fresh thyme or oregano can provide a wonderful aroma that complements the garlic aioli beautifully.
Questions About Recipes
→ Can I use store-bought mayonnaise?
Yes, store-bought mayonnaise works perfectly if you're short on time.
→ How can I store leftover aioli?
Store leftover aioli in an airtight container in the refrigerator for up to a week.
→ Can I make the aioli ahead of time?
Absolutely! Making it the night before allows the flavors to intensify.
→ What can I use if I’m allergic to garlic?
You can substitute roasted garlic with roasted red peppers for a different, yet tasty dip.
Roasted Garlic Aioli with Focaccia
Created by: The Chefwoven Team
Recipe Type: Comfort Dinner Recipes
Skill Level: Beginner
Final Quantity: 8 servings
What You'll Need
For the Aioli
- 1 whole garlic bulb
- 1 cup mayonnaise
- 2 tablespoons lemon juice
- 1/4 teaspoon salt
- 1/4 teaspoon black pepper
- 1/2 cup olive oil
For the Focaccia
- 2 cups all-purpose flour
- 1 teaspoon active dry yeast
- 1 teaspoon salt
- 1 cup warm water
- 2 tablespoons olive oil
- 1 teaspoon rosemary (fresh or dried)
How-To Steps
Preheat your oven to 400°F (200°C). Cut the top off the garlic bulb to expose the cloves. Drizzle with olive oil, wrap in foil, and roast for 30 minutes until soft.
In a bowl, combine flour, yeast, and salt. Stir in warm water and olive oil until a dough forms. Knead for 5 minutes, cover, and let rise for 1 hour.
Once the garlic is roasted and cool, squeeze the cloves into a bowl. Add mayonnaise, lemon juice, salt, and pepper. Mix until smooth and slowly drizzle in olive oil while whisking until creamy.
Preheat the oven to 425°F (220°C). Shape the dough into a rectangle on a baking sheet. Make dimples with your fingers, drizzle with olive oil, sprinkle with rosemary, and bake for 20 minutes until golden.
Once cooled, cut the focaccia into squares and serve with the roasted garlic aioli. Enjoy the combination!
Extra Tips
- For an extra kick, add a pinch of cayenne pepper to the aioli. You can also experiment with adding herbs like basil or parsley for a different flavor profile.
Nutritional Breakdown (Per Serving)
- Calories: 150 kcal
- Total Fat: 14g
- Saturated Fat: 2g
- Cholesterol: 5mg
- Sodium: 220mg
- Total Carbohydrates: 7g
- Dietary Fiber: 0g
- Sugars: 1g
- Protein: 1g